Platinum Palladium printing process:
Below is an outline of my process which is constantly evolving, and should be viewed as an insight to my workflow rather than a printing tutorial. There are links to various sites I have found useful for learning the process if you would like to know more on the history, or any of the steps outlined below. Also, please send me an email with any further questions.

Supplies for making a Platinum Palladium print:
- Paper: my favorite is Bergger COT320
-Glass beaker/shot glass for mixing chemistry
-Chemistry
-Brush/glass rod for spreading the emulsion
-Pencil to write notes of chemistry mixture, paper, negative used and date
-Syringe to apply emulsion to paper
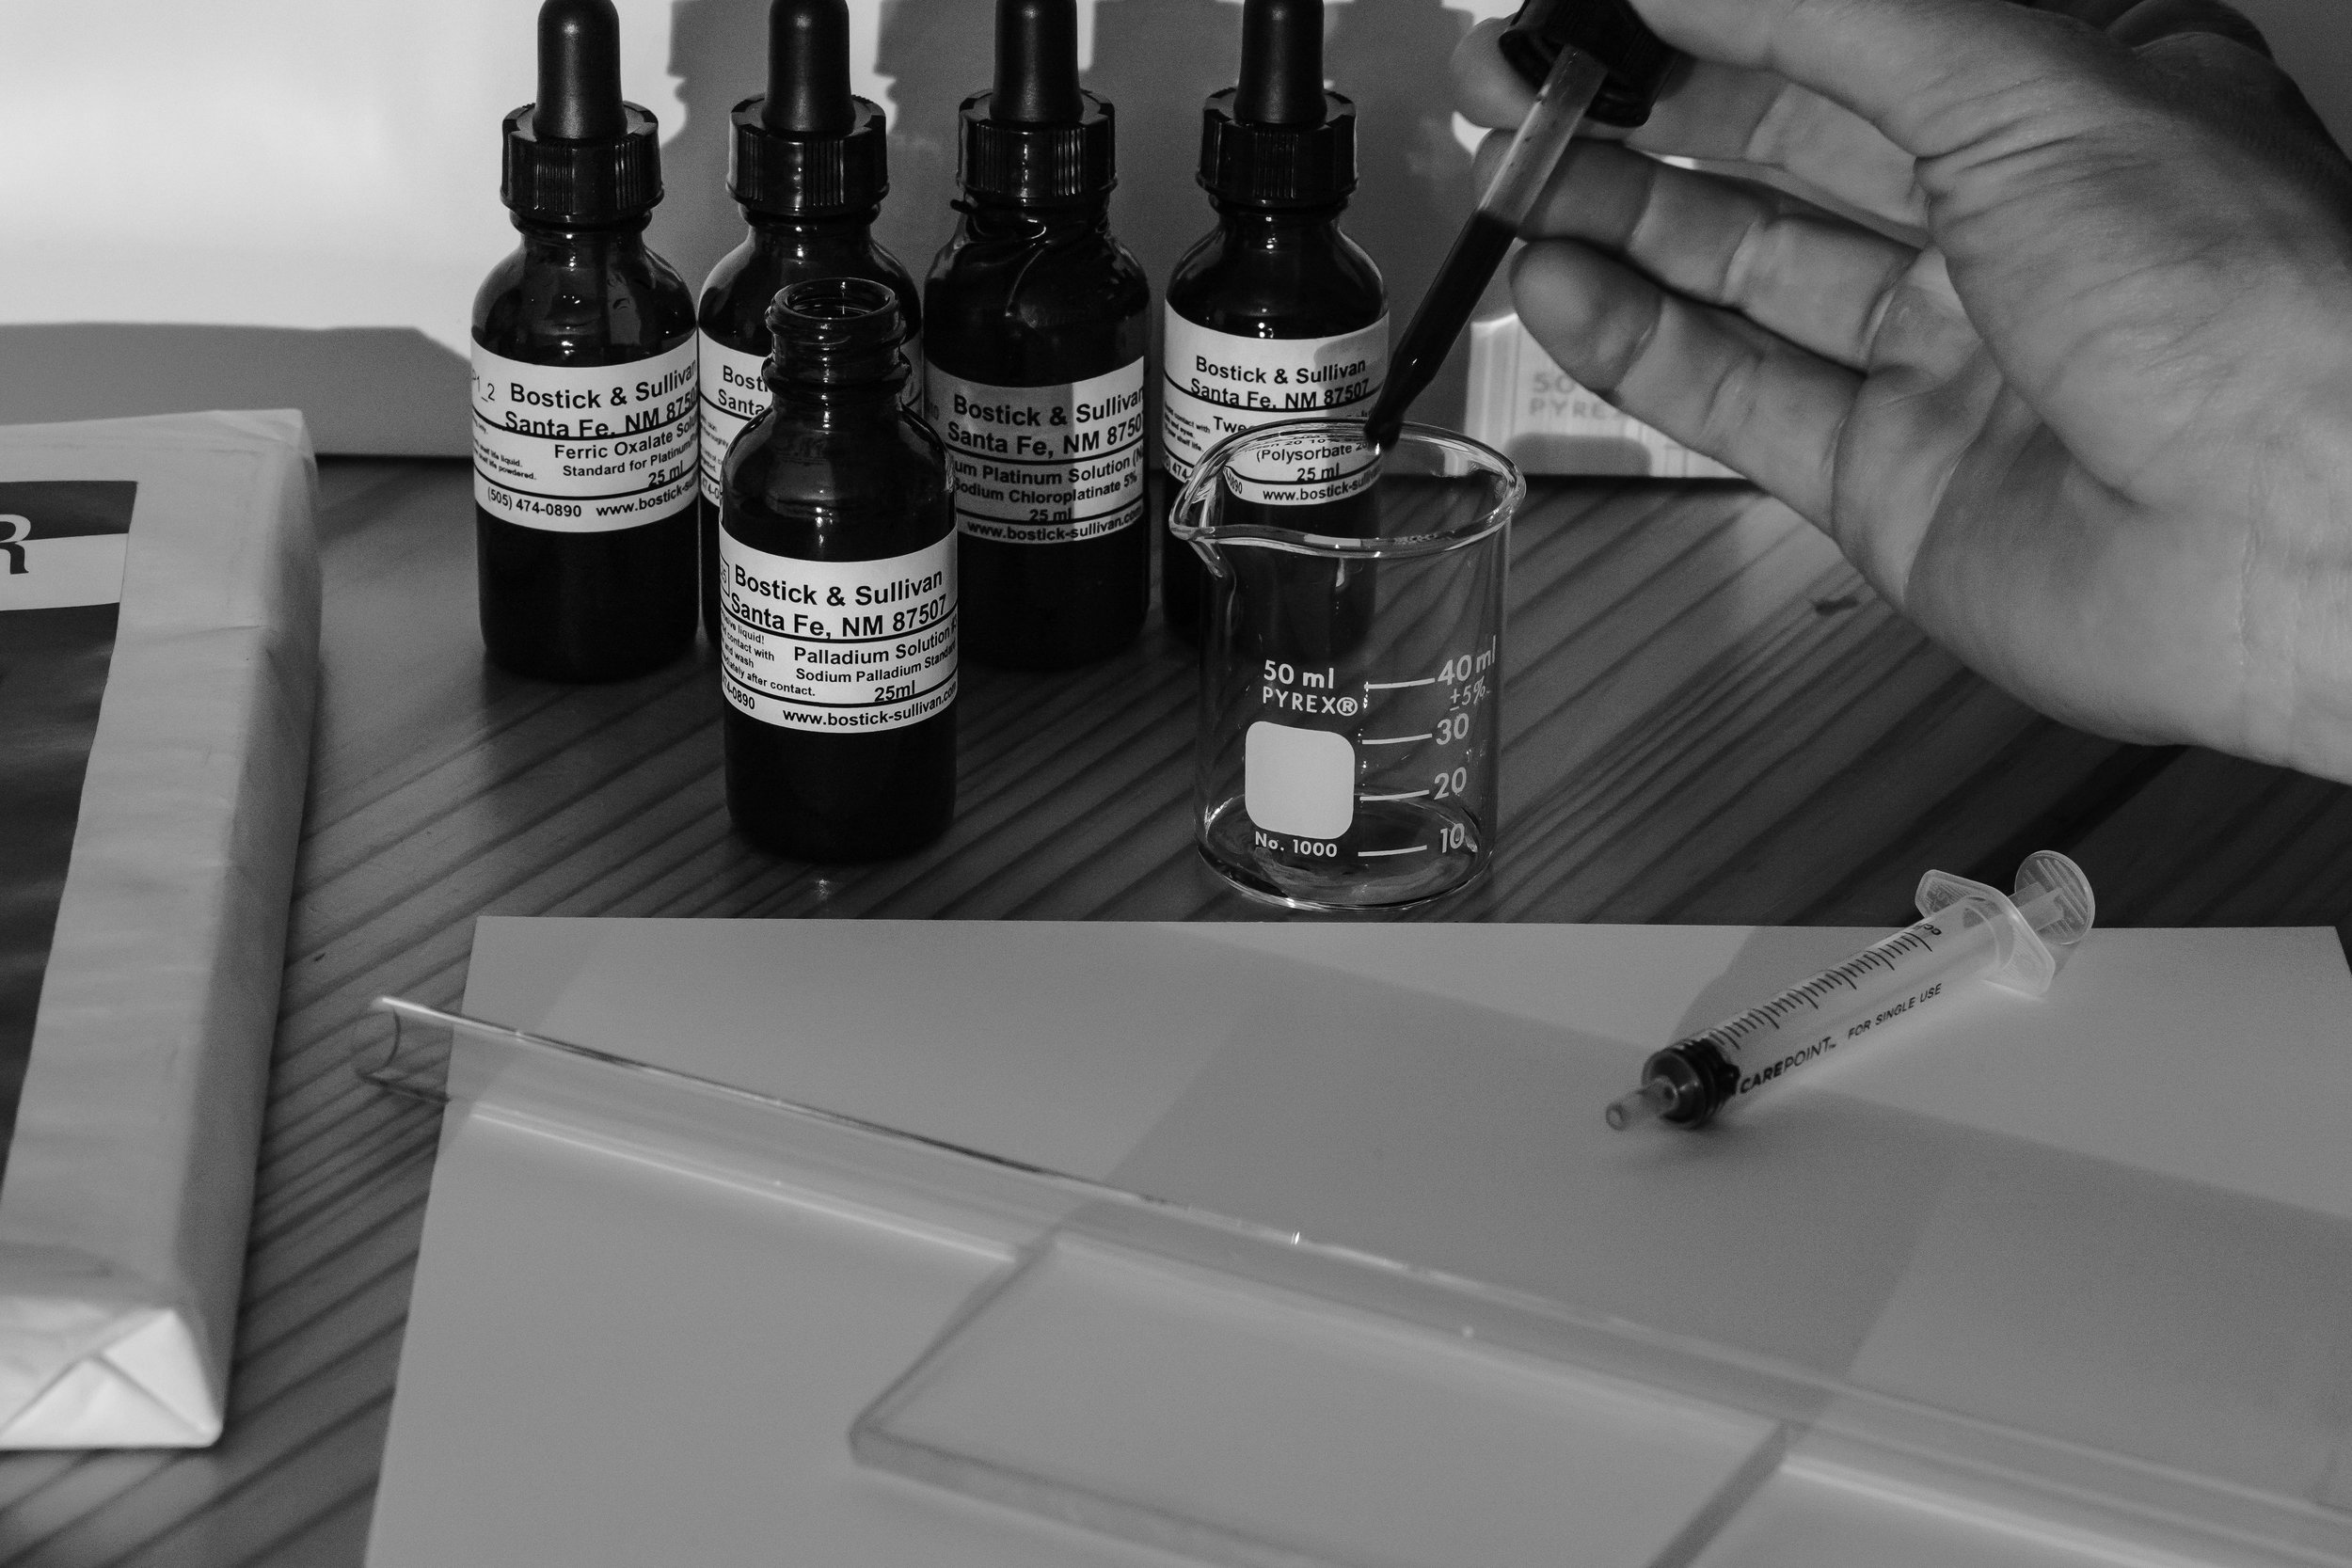
Chemistry, part I :
I purchase all of my chemistry from Bostick and Sullivan. They have an incredible selection of supplies and tutorials for alternative printing methods. A link to their website can be found below.

Chemistry. part II:
A light sensitive emulsion is made from a ratio of:
-Palladium #3
-5% Sodium Chloroplatinate (Na2 Platinum)
&
-Ferric Oxalate Solution #1
- I also use, in different amounts depending on the print, a mixture of Tween 20 and Gold Chloride.

Applying the Emulsion, part I:
The chemistry is mixed in a glass beaker or shot glass before applying it to the paper.
High quality paper is essential, as I mentioned above, I use Bergger COT 320. Like other printing techniques, paper choice effects the tones and mood of a print.
Additionally, the print needs to withstand spending time submerged in liquid as it goes through a series of chemical and water baths.

Applying the Emulsion, part II:
To apply the emulsion I use a small syringe to distribute the chemistry where I want it on the paper.

Applying the Emulsion, part III:
Applying the chemistry to the paper by hand means each print is unique to the next.
I use a glass rod to evenly distribute the emulsion. This is a very crucial step, if the emulsion is not applied correctly, the print will have flaws which can not be corrected once the emulsion has dried.

Exposure, Part I:
When the emulsion has dried, it is now time to place the negative in the desired position for exposure. Since this is a contact printing process (meaning you do not use a photographic enlarger) the negative size dictates the size of the final print. So, an 8x10 inch negative will result in an 8x10 inch print.
Negatives can be made traditionally with a Large Format camera (4x5, 5x7, 8x10, 11x14, etc..), or digitally. Here is a link to a great source on printing digital negatives:

Exposure, Part II:
Once the negative is placed in the position desired, it is placed in a contact printing frame.
Although they look similar to ones used to hang photos on a wall, a contact printing frame is more robust and has a back which applies even pressure across the print surface for uniform exposure. Mine uses leaf springs which I have found to work the best.

Exposure, Part III:
The print is now ready to be exposed. Platinum Palladium prints are sensitive to UV light, so the print needs to be exposed to sun light or in a UV exposure box.
I prefer to use an exposure box for the consistency.

Exposure, Part IV:
Just like with other photographic process’, platinum prints need to be exposed for a specific amount of time to attain the desired results.

Development, Part I:
Now that the print has been exposed, it is now ready to be developed. Essentially, there are three steps: Develop, clear, wash. I add a step between developing and clearing by washing the print for a few minutes in distilled water.

Development, Part II:
There are several different developers for Platinum Palladium:
- Sodium Citrate - neutral-tones.
- Ammonium Citrate - cool, black tones.
- Potassium Oxalate - warm tones at room temperature, and a brown-tones if used at 100+ degrees (Fahrenheit). My preferred choice.
- Cold Bath Developer - produces warm tones, the name stems from the temperature it can be used when developing rather than the tones produced.

Development, Part III:
While a silver gelatin print slowly comes to life in developer, development for a Platinum Palladium print happens almost instantly. Especially when using developers at a higher temperatures.

Development, Part IV:
After the print has set in the developer for about 1-2 minutes, I transfer it to a distilled water bath. Then the prints goes through a series of 3 clearings baths using a combination of Tetra-Sodium EDTA and Sodium sulfite. This step removes the yellow stain left behind after developing.
Finally, the print is placed in a running water bath for 20-30 minutes, then dried overnight.


